Hi everyone,
Apologies for the long absence…….. I had a big workshop at the weekend to prep for, plus trying to get samples made for an all day event that’s coming up in March. Put the 24th March in your diaries for a fun fill crafty day!!!! More details will follow shortly :o)
So today I wanted to share with you some more cards that Cate had us making at our baggie book day back in January. These cards all use the Outlined Occasions stamp set that you can only get during Sale-a-bration when you spend £45 on items from the main or mini catalogues.
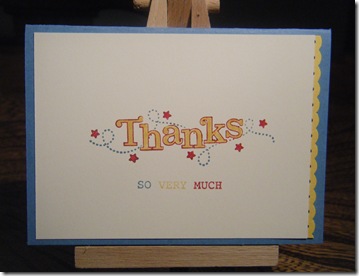
I really liked making these cards as they are all so totally different. The first one is a mini card that's just so simple, yet effective. The Thanks image was stamped onto Very Vanilla card using the markers to ink it in the different colours. The base is Marina Mist, with a little edge of Daffodil Delight punched with the Dotted Scallop Ribbon Border. I think this is my favourite punch of the moment!!!
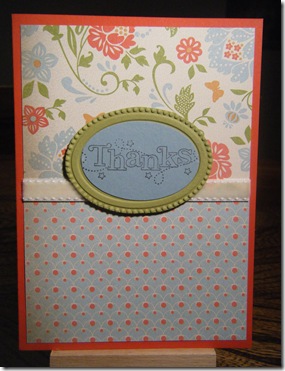
The second card uses some of the delightful Everyday Enchantment DSP which is another offering during Sale-a-bration. The base is Poppy Parade and there is a strip of the very touchable Velvet Designer Ribbon which features in the Mini Catalogue on page 11 (you can get some of this in my Spice Cake Product Share – click HERE) The Thanks image has been stamped onto Baja Breeze and punched with the Extra Large Oval punch, which fits right inside the Oval Designer Frame Embossing Folder which has been embossed onto Lucky Limeade card. Stampin’ Up! is all about co-ordination and making life easy!!!!
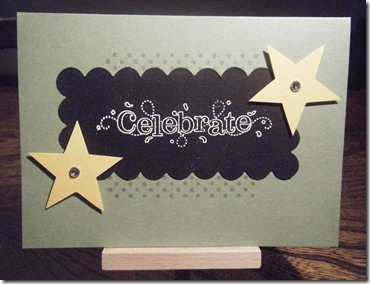
The next card uses the Celebrate stamp in this set. It has been stamped in Versamark onto Basic Black card, then sprinkled with White Embossing Powder and heated. This really pops off the page! The Basic Black has been run through the Big Shot with the Scallop Square Die, then the card has been moved up and run through again to get a Scallop Oblong shape. Now you may be thinking “Stampin’ Up! don’t have a star punch in the catalogue” and you’d be right! The stars on this card have been made using the 5-Petal Flower Punch, then you just snip from the point of each petal to the base where they all join and you get this fab star……………
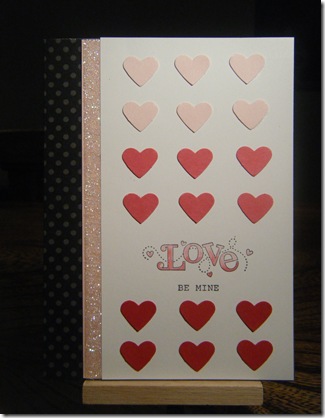
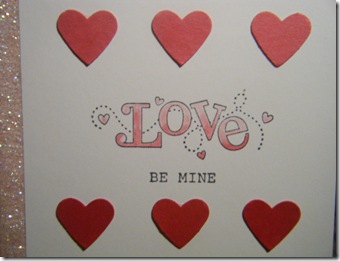
The last card is my favourite – and if my other half hadn’t seen it then it would have been perfect for next Tuesday! Remember – it’s Valentines Day just around the corner!!! If you want some crafting goodies as a gift, then check out the Gift tab on my website HERE – subtly send a link to your other half and get him to order you a gift voucher so you can pick all of the items you’d love, and take advantage of SAB as well!
So this card has a Basic Gray base, with a strip of Basic Black DSP running down the spine. The glittery strip is done by putting a strip of Red Sticky along the card and then dunking it in Dazzling Diamonds. The glitter sticks really well so you won’t find it dropping off all over the place :o) The Love image was inked in Basic Gray which is waterproof. This allowed for the use of Blender Pens. Using a Melon Mambo marker pen I brushed some colour onto the lower part of the image. Using the blender pen I then went about dragging the colour up the wording to give a multi-tone effect. The hearts were all punched out and stuck on in rows – which was probably the hardest bit – getting them lined up.
I hope these cards have given you some inspiration. Thanks again to Cate for arranging the baggie book day – check out her blog HERE

Wonderful cards! I love the shades of red and pink and the glittery strip!
ReplyDelete